This is the last of my basic tutorials, so if in the future you get lost wondering how to make a hotkey or a button or where to put a script so Maya picks it up, you can just refer back to these first three and get a reminder. I won’t be getting into anything much crazier than you see in these first three videos, I’ll just be using these few techniques for a lot of different things.
You will find the Hotkey Editor under Windows > Settings/Preferences > Hotkey editor.
On the right side you will see a map showing keys that are in use as hotkeys. They show up in teal.
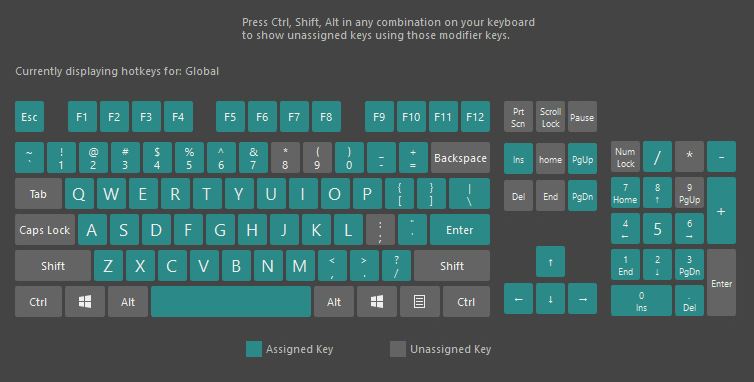
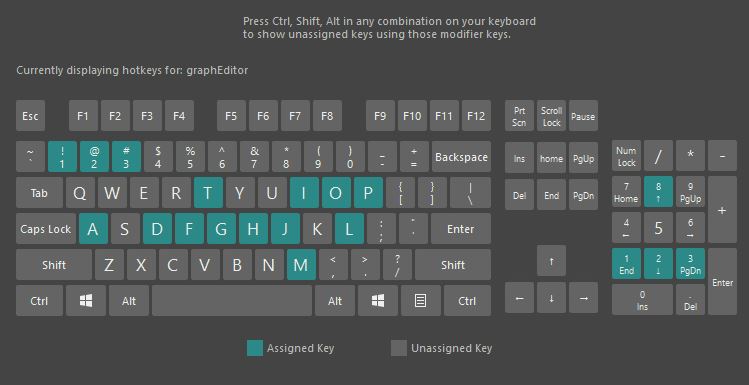
This map will update itself as you press Ctrl, Shift, Alt or when you go into hotkeys for specific editors, like it can be seen doing here while showing the hotkeys for the graph editor.
Looking to the right, we have some options to go through. The first is the menu category.
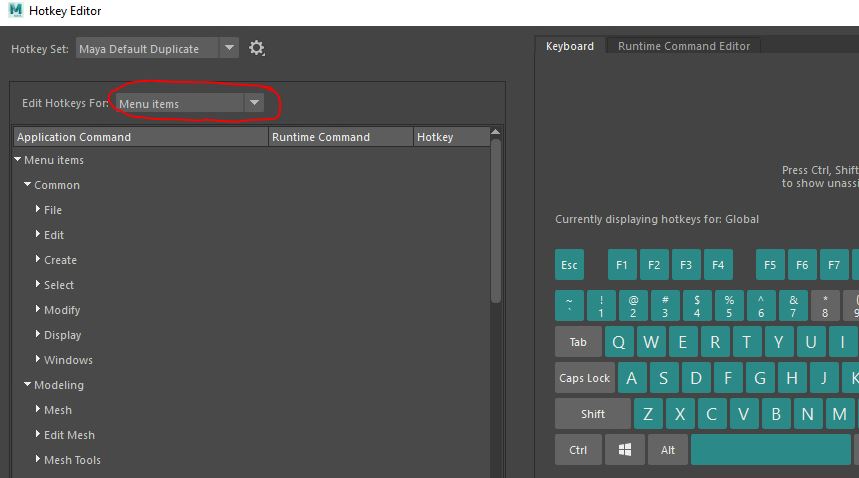
This is where you can assign or edit hotkeys for the menus at the very top of the program. Maybe you want to change the key for Save as, or Undo. For this example I chose to add a key to a menu item that doesn’t already have one. I made it so ‘m’ will open my Graph Editor. 
You can see that I’m given a warning because another command is using ‘m’ as a hotkey. It’s not a tool I ever use, though, so I’m fine to continue. If ‘m’ has an on-release command, you may also see a warning for that. You can click through them both.
Now I’ve chose, our next category: Editors (1.). It shows up blank, so I’ve selected the Graph Editor (2.)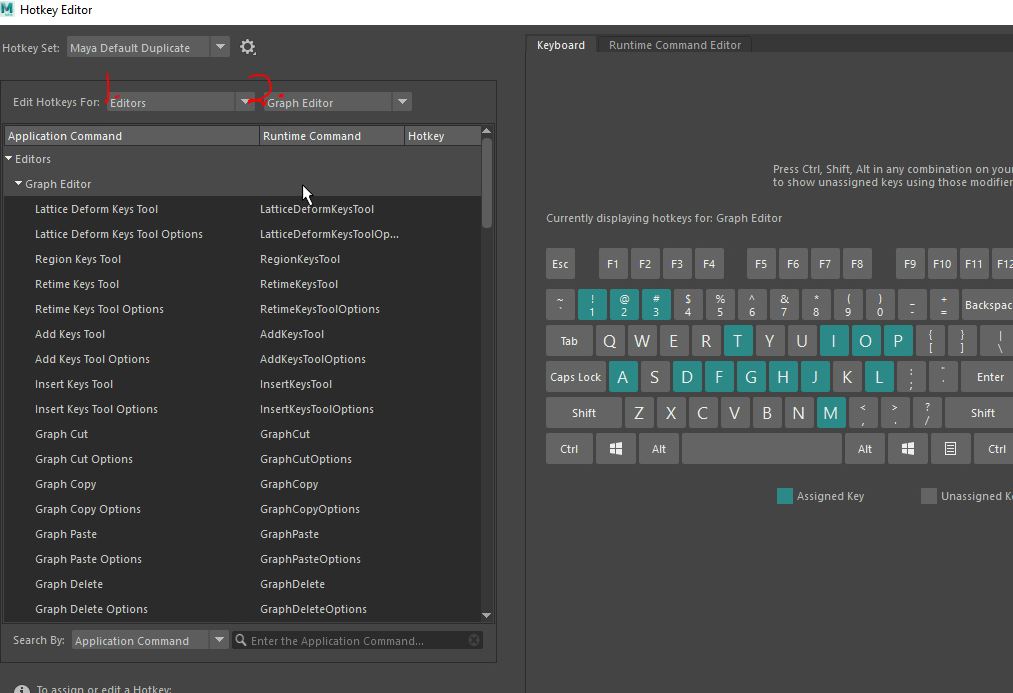 This is where I can edit all the hotkeys for tools and commands that are specific to the graph editor. It’s also a good place to look for tools that could be useful but that I might not otherwise have known existed.
The third category is “Other Items” which is just a catchall for things that aren’t on menus or aren’t specific to an editor. It’s also a great place to trawl for unknown, but helpful, tools. 
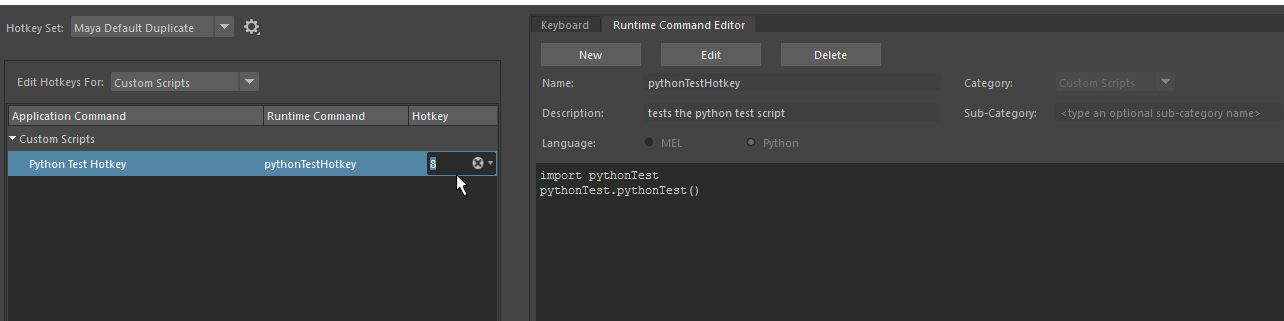
Time for category four, Custom Scripts (1.) I use this more than the other three combined. It lets you enter in some code, either MEL or Python that can then be assigned to a hotkey. It can be a call to one of your scripts in your scripts folder or it can be the whole script itself, depending on how the script was written and your personal preference. To set up a script for use, click on the “Runtime Command Editor,” tab (2.), and then click “New” (3.) This will then allow you to type in the rest of the boxes below. Enter a name (4.). The name is a mandatory field and has to be unique in your scene. It can also only contain letters, numbers and underscores. The description (5.) is optional, but a good idea. When you accumulate a bunch of these, you’ll be glad you kept notes. (6.) Select the appropriate language, (7.) paste or write the code and then (8.) save.

Now that that’s done, your runtime command will show up on the left, and you can finally assign a hotkey to it. I chose “8,” since it was otherwise unoccupied. Now every time I hit “8,” my test script runs.
If you’re looking for the NURBS-toggle MEL script from my other example in the video, here it is:
string $panel = `getPanel -wf`; modelEditor -e -nurbsCurves ( !`modelEditor -q -nurbsCurves $panel` ) $panel;
Finally, these menus can be tricky to navigate and a little daunting, so if you don’t see what you’re looking for, there’s a search in the bottom left corner.
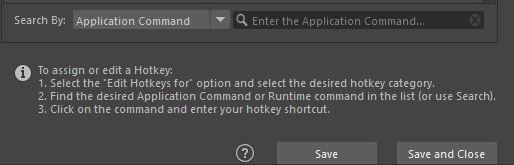
Now you should be able to make hotkeys like a pro.